How to replace the Mitsubishi Pajero’s Radiator Support both Upper and Lower Insulators
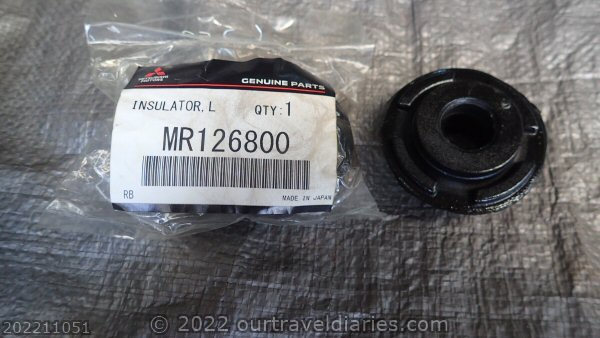
- MR126800 Lower Pajero Radiator Insulator
The radiator support insulators supports the Pajero’s radiator while insulating the radiator from road vibrations. The rubber support insulators can also help to protect the radiator from Radiator Electrolysis. Radiator Electrolysis is a condition caused by electrical current running through the coolant. A small amount of electrical current of around 1.0 volt is acceptable but any voltage higher than that should be investigated as it can cause corrosion to the radiator.
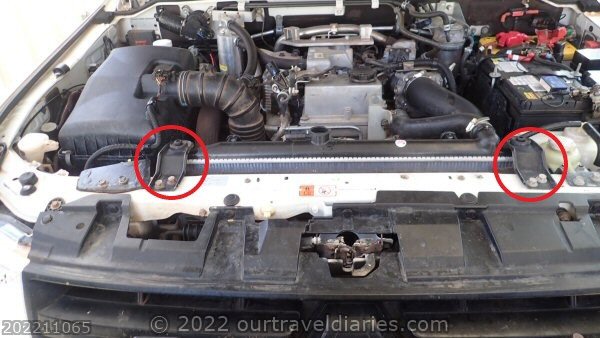
- Pajero Upper Radiator Support Insulator 1351A012
The removal and replacement of both the upper ( 1351A012 ) and lower radiator ( MR126800 ) insulators is a very easy task to perform. Fortunately the Pajero radiator does not need to be removed as there is enough movement in the radiator hoses to allow for the radiator to be levered up so that the lower ( MR126800 ) support insulators can be replaced after the upper radiator support insulators have been removed. The radiator insulators could possibly be replaced without emptying the Radiator coolant. Although probably would be better done when changing the engine coolant and having an empty radiator. The Radiator needs to be levered up to allow the bottom Radiator Insulator to be removed / installed and with coolant in the Pajero’s radiator may make it too heavy to lift easily.
This guide is part of a series associated with the changing of the Engine Coolant on a Mitsubishi Pajero and replacing various components related to the Engine Coolant / Radiator system.
[ Mitsubishi Pajero NW Coolant Temperature Sensor Replacement ]
While it is easy to view and inspect the upper radiator insulators. It is difficult inspect the lower radiator insulators are without removing the lower support insulators. So I decide to replace the lower radiator insulator regardless of their condition. The parts are pretty cheap so replacing then saves the effort of popping them out to check. Not that it would be too hard to pop the insulators to check before purchasing new insulators.
The original Mitsubishi parts ( 1351A012 and MR126800 ) where brought from Partsouq. Buying OE parts from either Partsouq or Amayama saves between 30 to 50 percent from the price that the Mitsubishi dealer charges.
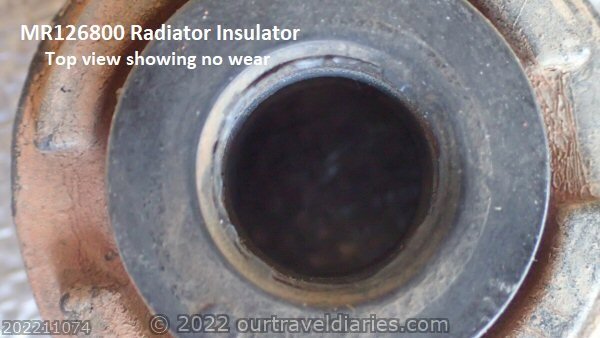
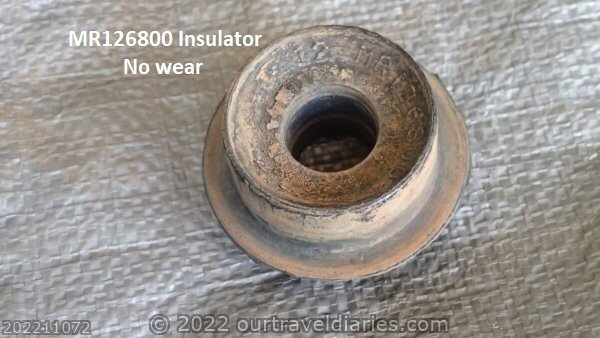
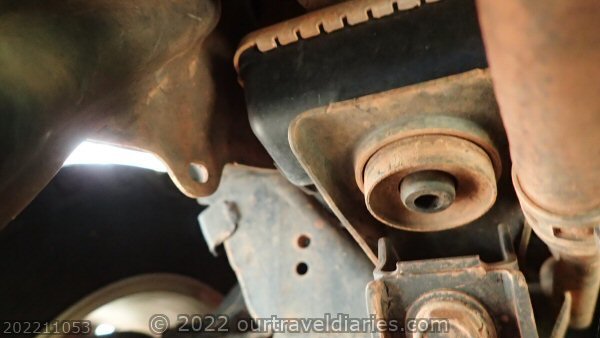
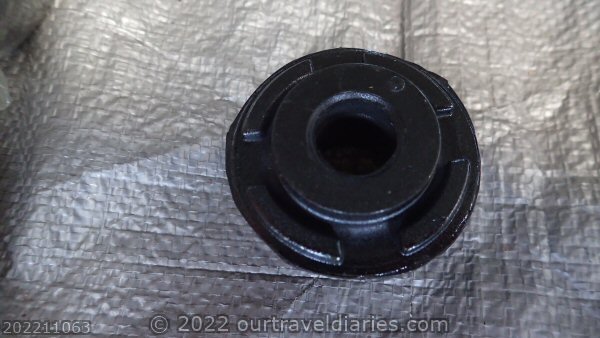
- View of the top of the Pajero’s MR126800 lower insulator shows minimal wear
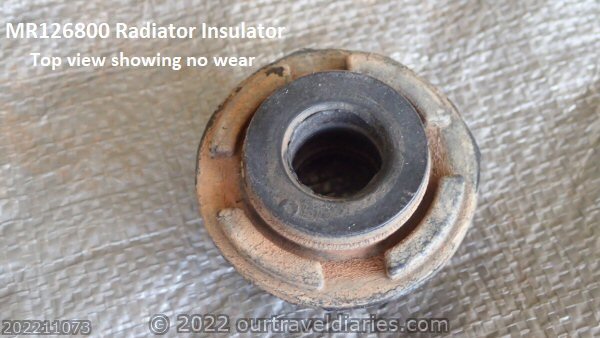
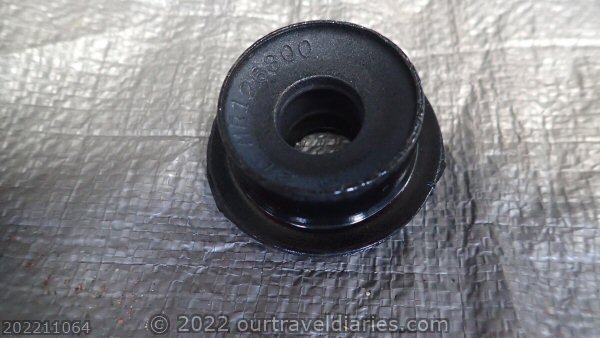
- The Pajero’s MR126800 lower support insulator show minimal wear
- Bottom view of the MR126800 lower insulator show minimal wear
The upper radiator insulators ( 1351A012 ) after being remove and inspected where found to have almost no wear at all. The same applied to the lower ( MR126800 ) radiator insulators almost no wear at all. Most likely both upper and lower support insulators would last for the life of the Pajero.
This meant that it was not necessary to replace either upper of lower insulators. It was decided to replace the lower radiator ( MR126800 ) insulators anyway as having taken the time and effort to remove the lower insulators and having already brought the Parts then why not may as well put the new lower insulators in any.
My Mitsubishi Pajero NW MY2014 has currently done about 145,000 kms over 8 years. With most of these kilometers being done off road and on heavy corrugated tracks / gravel roads.
This guide should be able to be applied to all Mitsubishi Pajero models.
Tools Required
Top Radiator Insulator x 2 Mitsubishi Part Number 1351A012
Bottom Radiator Insulator x 2 Mitsubishi Part Number MR126800
12 mm Socket or socket wrench
Optional Car Jack or other lifting device
Step One: Remove the Radiators Upper Insulators.
While the upper Pajero radiator insulators are not being replaced at the moment they still need to be removed so that the radiator can be lifted slightly to allow the lower radiator insulators to be removed. Of course if required the top insulators could be replaced simply by fitting new ones when the top radiator support insulators are bolted back down.
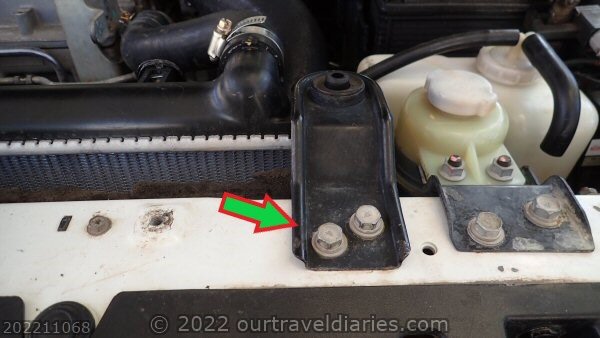
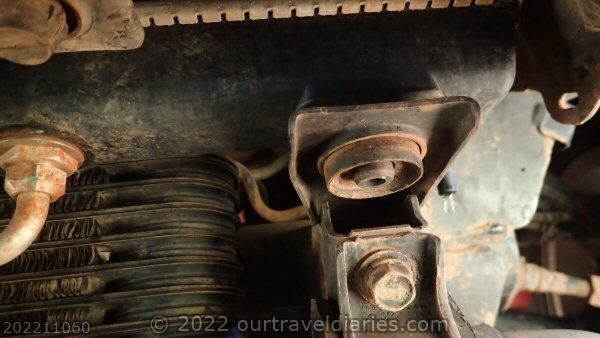
- Pajero’s Upper 1351A012 radiator support insulators
With a 12mm socket or 12mm spanner remove the bolts to both the Left and Right top radiator insulators. (Note the bracket to left of the top insulator is for my ARB compressor if you are wondered why your Pajero looks different from the photo of my Pajero.)
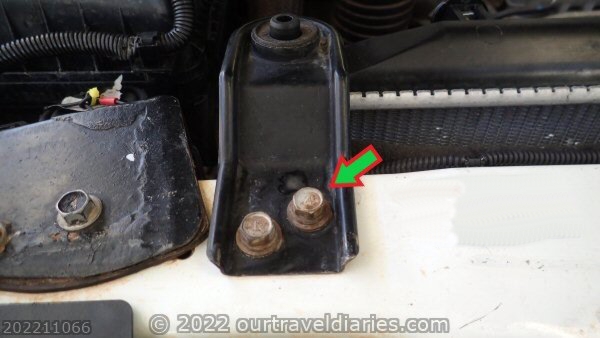
First unbolt both bolts to the left hand Upper Radiator Support Insulator.
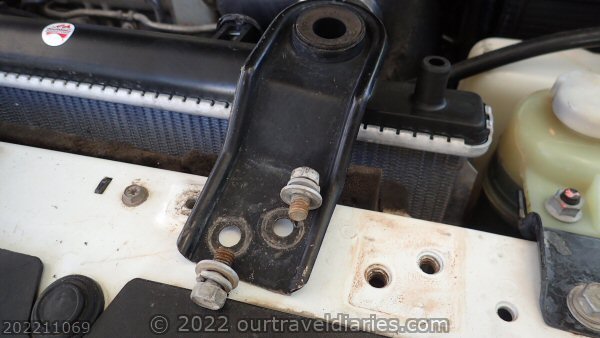
- Unbolt the Pajero 1351A012 Left Upper Insulator
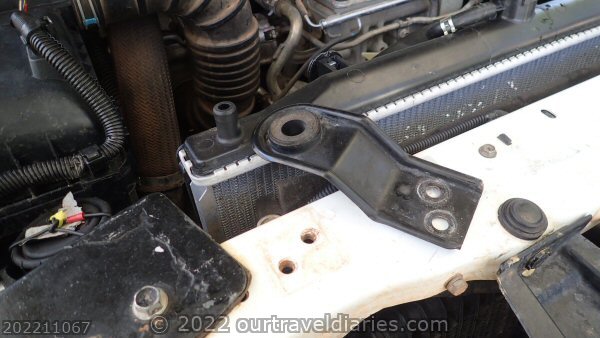
- The 1351A012 Left Upper Insulator unbolted
Next unbolt both bolts to the right hand Upper Radiator Support Insulator.
- Unbolt the Pajero 1351A012 Right Upper support Insulator
- The Pajero 1351A012 Right Upper support Insulator unbolted
Step 2: Remove and replace the Pajero’s Lower radiator insulators.
No radiator hoses including the transmission cooler hose need to need to be disconnected as there is enough movement in the radiator to allow the insulators to be replaced by lifting the radiator from the bottom and pushing / lifting it up.
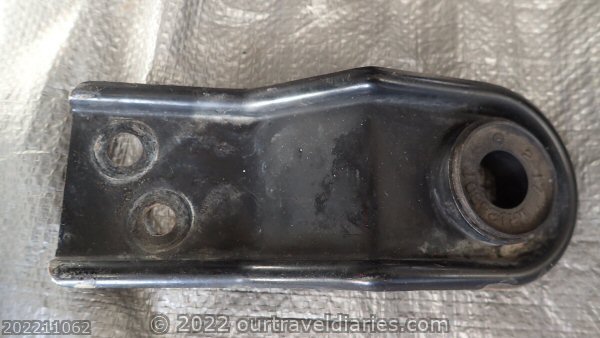
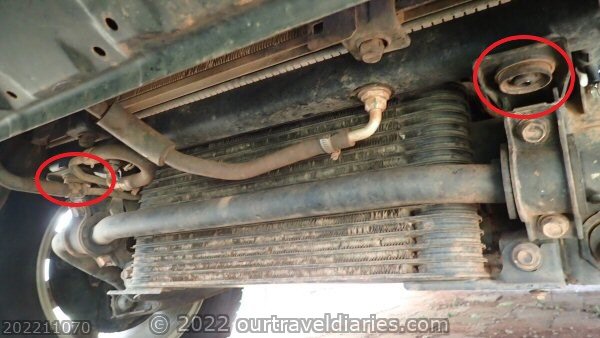
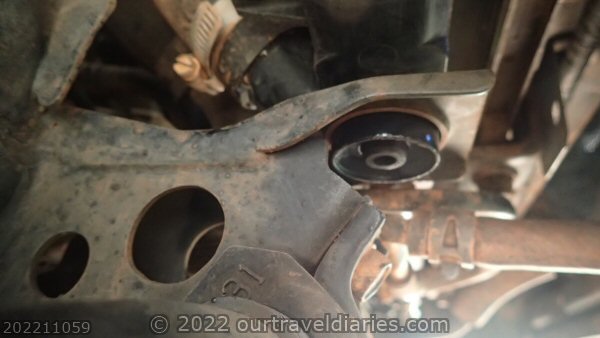
- The MR126800 lower support insulators
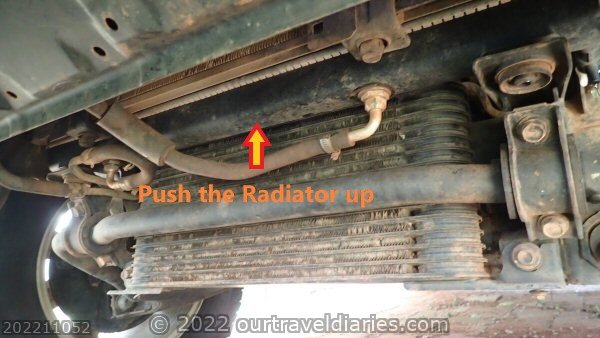
It would be possible to place a car jack in the middle of the radiator and use that to lift the radiator. It would be best to put something soft between the jack and radiator to protect the Pajero’s radiator from any possible damage and be careful that the transmission cooler hoses are also not damaged. .
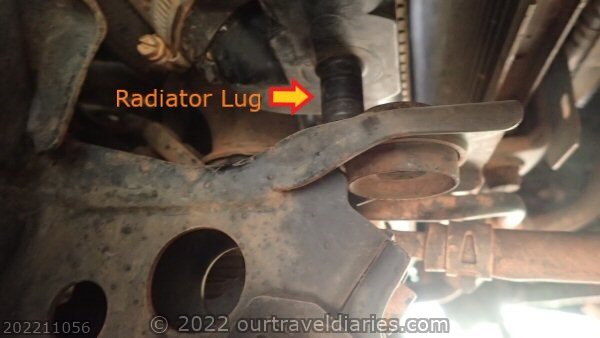
- The Pajero’s radiator needs to pushed up to clear the Radiator seating lugs.
- The Left Hand MR126800 insulator
Remove the Left Hand Radiator Support Insulator
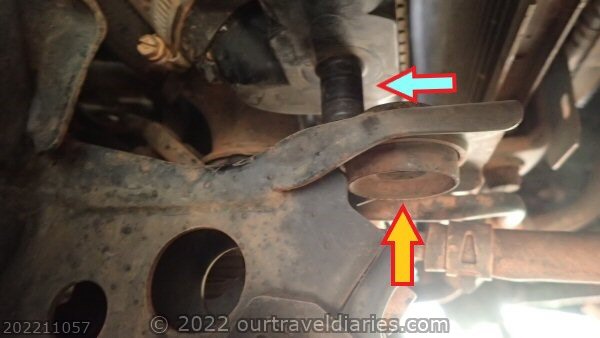
Starting with the left side of the radiator (It doesn’t matter which side left or right is removed first). Gently push the radiator up until the lug that is part of the radiator goes through the center of the radiator’s lower insulator clears the lower support insulator. While the radiator is still being pushed up gently move the radiator back towards the engine until the lug will no longer contact the insulators when the radiator is released.
The insulator may need to be held to stop from lifting up with the radiator.
- The Pajero’s radiator seating lug on the left side on the radiator.
- The radiator needs to be pushed up and back so that the seating lug clears the radiator bracket
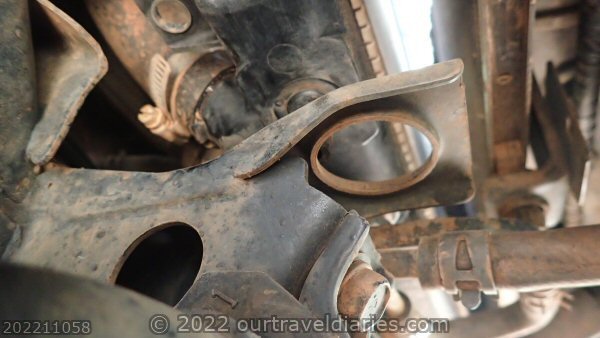
Press the old lower radiator insulator up and sideways till the insulator clears the radiator bracket and can be completely removed.
There is a up and a down side to the insulator. It can only go one way. Now simply slide the new insulator into the radiator bracket making sure that it drops into place correctly. Push the Pajero’s radiator up a little bit and move it forward so that the radiator lug can be placed into the center of the lower insulator. Drop the radiator down.
- Pajero MR126800 insulator view from the bottom
- MR126800 insulator inserted into the Radiator bracket
Step Three: Repeat for the Right Hand Radiators Lower Support Insulators.
Do the same thing to the right hand side.
- Right hand support radiator insulator
Step Four: Finished
Make sure that the lower insulators and the radiator is seated properly. Finally re-bolt the old upper radiator insulators (1351A012 ) or with new upper insulators to the Pajero.
- Pajero’s Upper 1351A012 radiator support insulators
Check everything looks good. That’s it finished.
Views: 64

